You can now run the Milk Audit in KidKare, in addition to running it in Minute Menu CX. Sponsors accomplish this through Observer Mode.
Are you a center? See Milk Audit at help.kidkare.com for instructions. Sponsors must enable this feature for you.
- Log in to app.kidkare.com. Use the same credentials you use to access Minute Menu CX. The Observer Mode page opens.
- Use the filters to locate the site for which to run the Milk Audit. For instructions, see Observer Mode.
- Click the center's name to view the center.
- From the menu to the left, click Food Program.
- Click Milk Audit. The Milk Audit page opens.
- Click the Month box and select the claim month to view.
- Select Calculated to view view milk audit information based on calculated quantities (attendance x required quantities), or select Calculated + Actual Served to view milk audit information based on calculated and actual served quantities.Note: This option may not display according to your settings. If this is the case, the numbers you are viewing are the Calculated numbers.
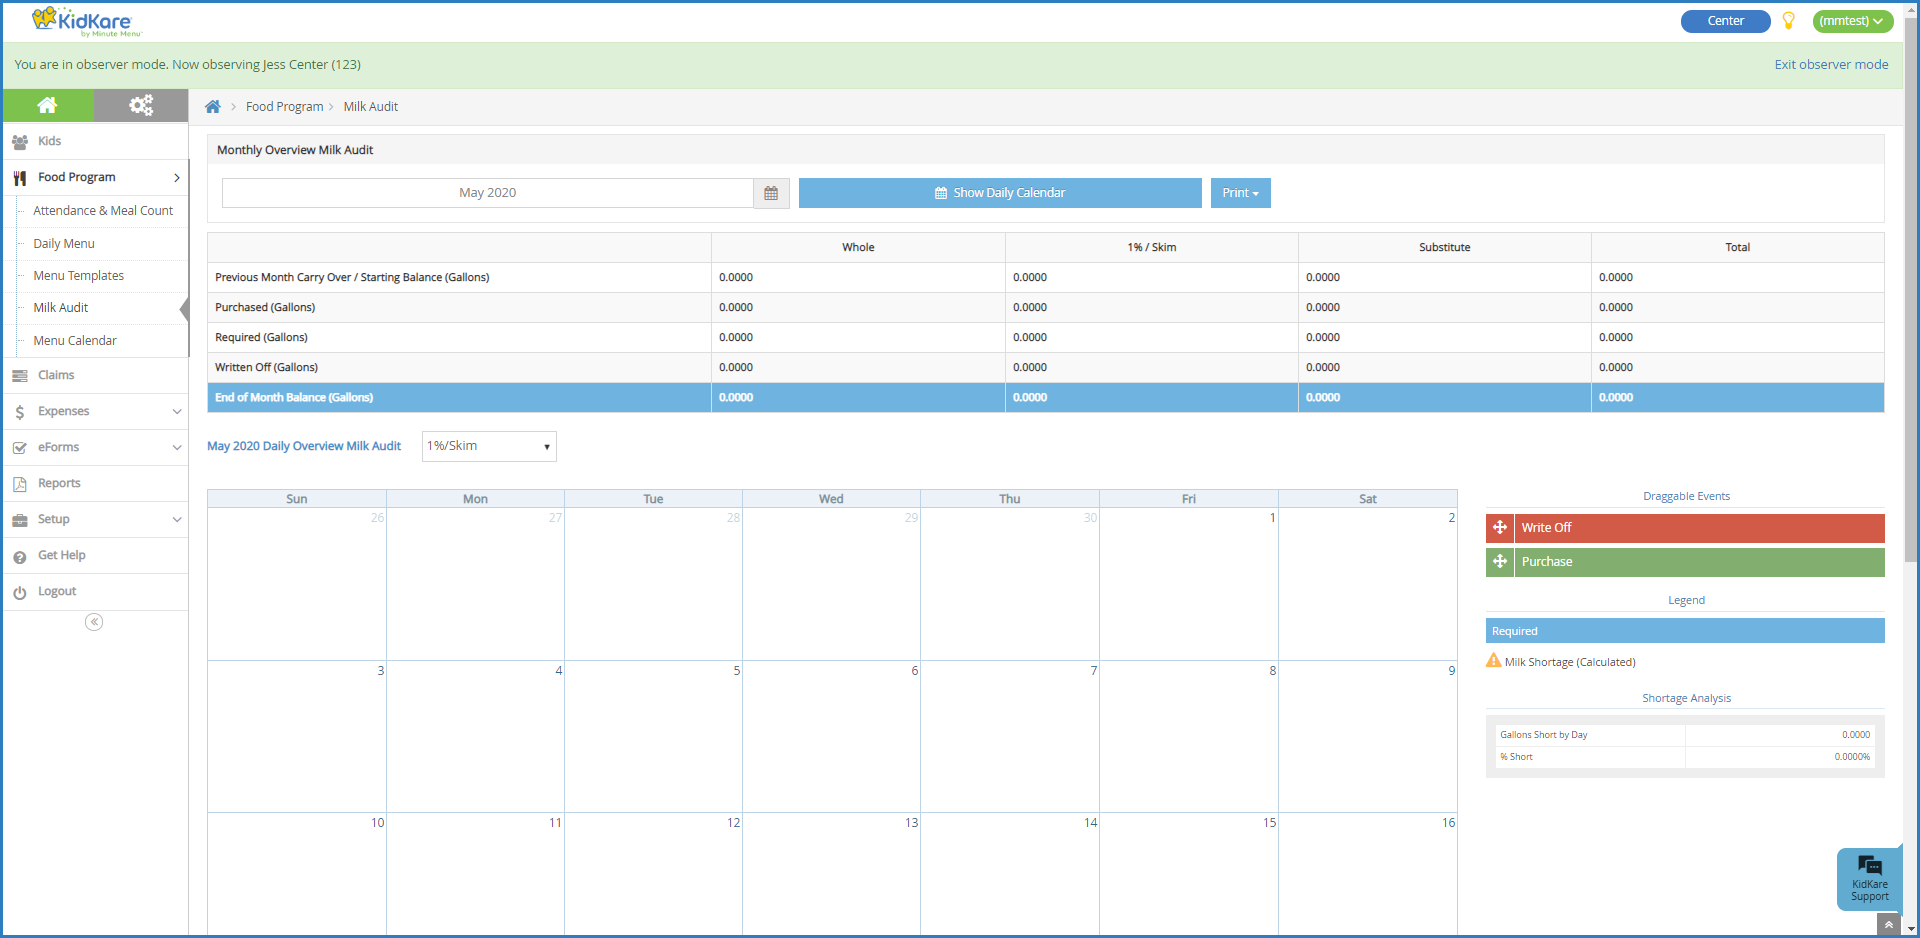
- The following information displays in the table for the selected month:
- Previous Month Carry Over/Starting Balance: This may be the ending balance from the previous month (depending on your specific policy settings). To edit starting balances, click
 , enter the new amount, and click
 . Note that this option may not be available according to your preferences or the preferences your food program sponsor set (if you are a sponsored center).
 - Purchased: This is the amount of milk purchased, based on receipt date.
- Required: This is the amount of milk required based on menus and meal counts.
- Written Off: This is the amount of milk written off for the month. For example, this number accounts for cases in which the milk was spilled, spoiled, and so on.
- End of Month Balance: This is the amount of milk leftover at the end of the month.
- Actual Served: This is the actual total of milk served during the selected month based on meal records. This row only displays if you select Calculated + Actual in Step 4.
- Actual End of Month Balance: This is the actual end of month balance based on the following formula: Carry Over + Purchased - Written Off - Actual Served. This row only displays if you select Calculated + Actual in Step 7.
- Previous Month Carry Over/Starting Balance: This may be the ending balance from the previous month (depending on your specific policy settings). To edit starting balances, click
- Click Print and choose a report to print. You can choose Summary Report or Detailed Report. Both reports download as PDFs.


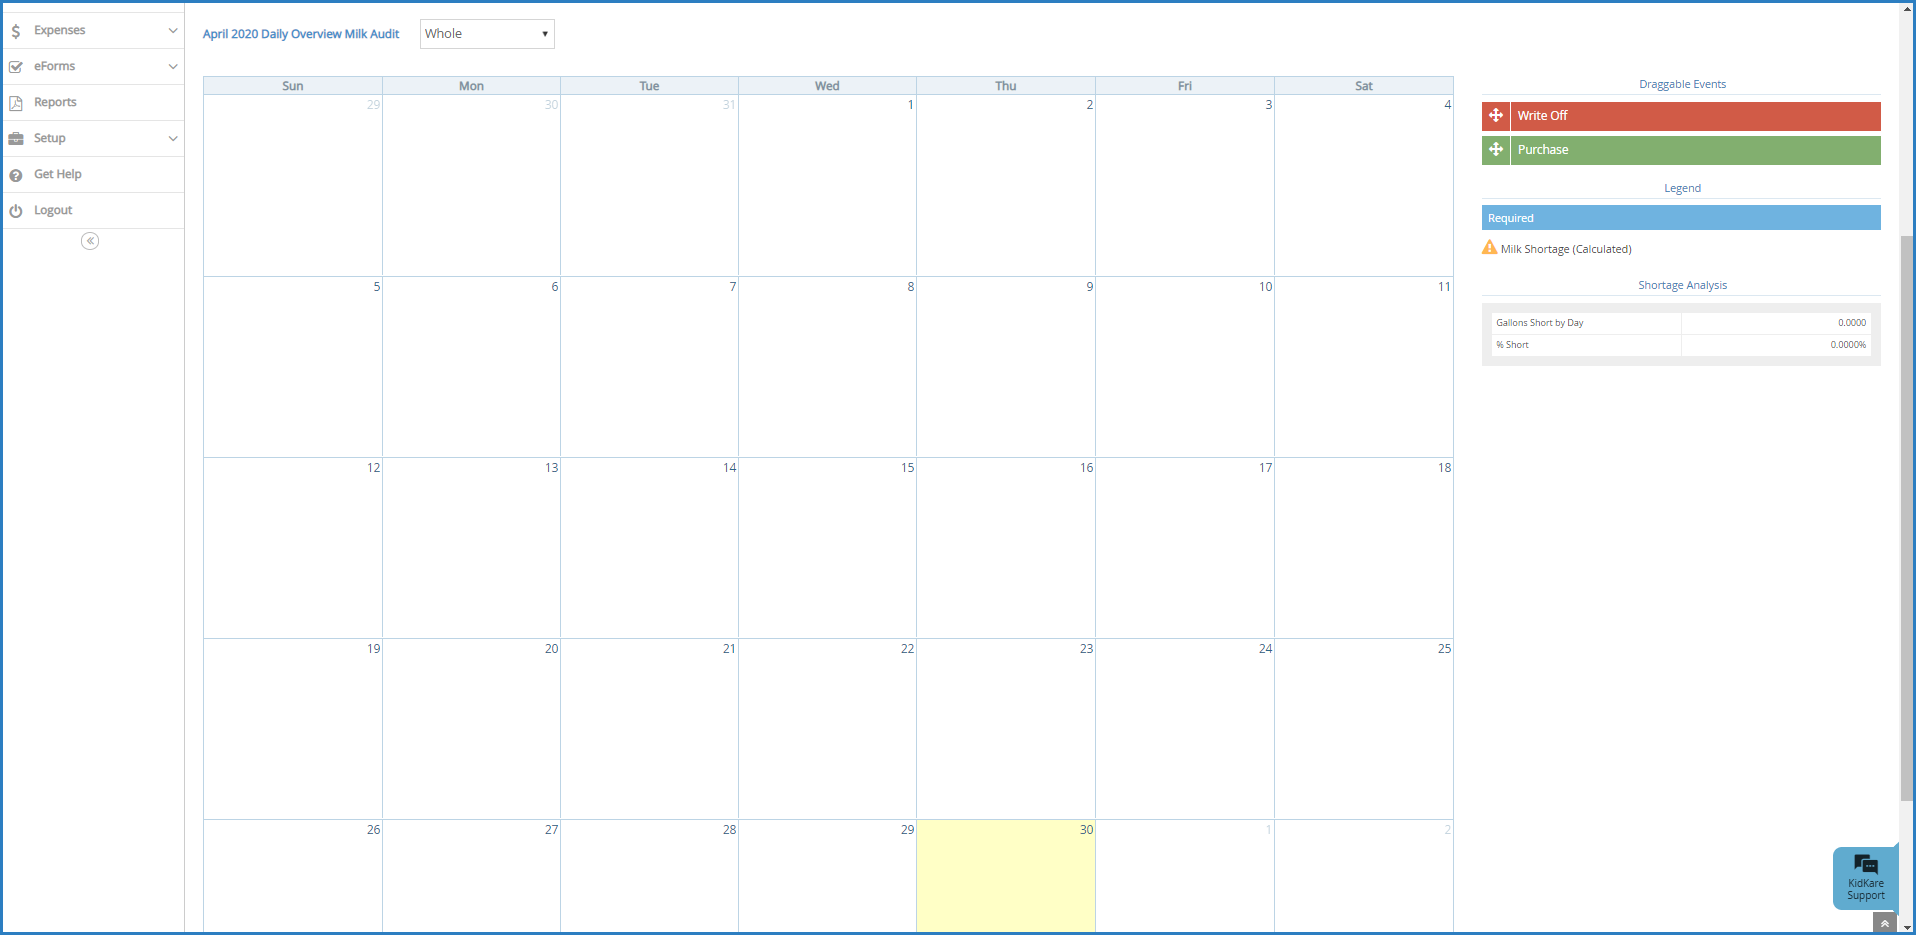
Using the Daily Calendar
Use the Daily Calendar to view and/or add milk events, such as purchases or write offs.
- Click Show Daily Calendar. The Daily Calendar displays at the bottom of the window. The Calculated version is shown in the figure below.

- Click the drop-down menu and select the milk type. You can choose from Whole, 1%/Skim, or Substitute.
- To add a write off:
- In the Draggable Events section, click the Write Off event and drag it to the calendar.
- Drop it on the day on which to apply it. The Milk Write Off pop-up opens.
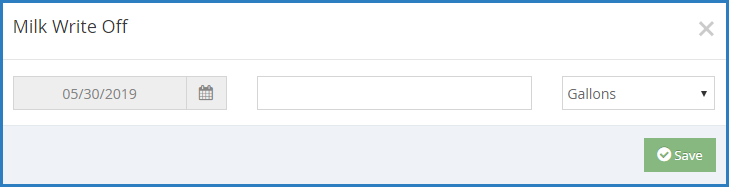
Notes: A day can only have one write off event at a time. You cannot change the date in the Milk Write Off pop-up. If you are a sponsored center, your food program sponsor must enable this feature.
- Click the text box and enter the amount of milk you are writing off.
- Click the corresponding drop-down menu and select Gallons, Pints, or Quarts. All units of measure are converted to gallons once you save.
- Click Save.
- To add a purchase:
- In the Draggable Events section, click the Purchase event and drag it to the calendar.
Note: You must have the Vendor/Receipts permission enabled on your account to access and work with Purchase events. If you are a sponsored center, your food program sponsor must enable this feature.
- Drop it on the day on which to apply it. The Add Expenses pop-up opens.
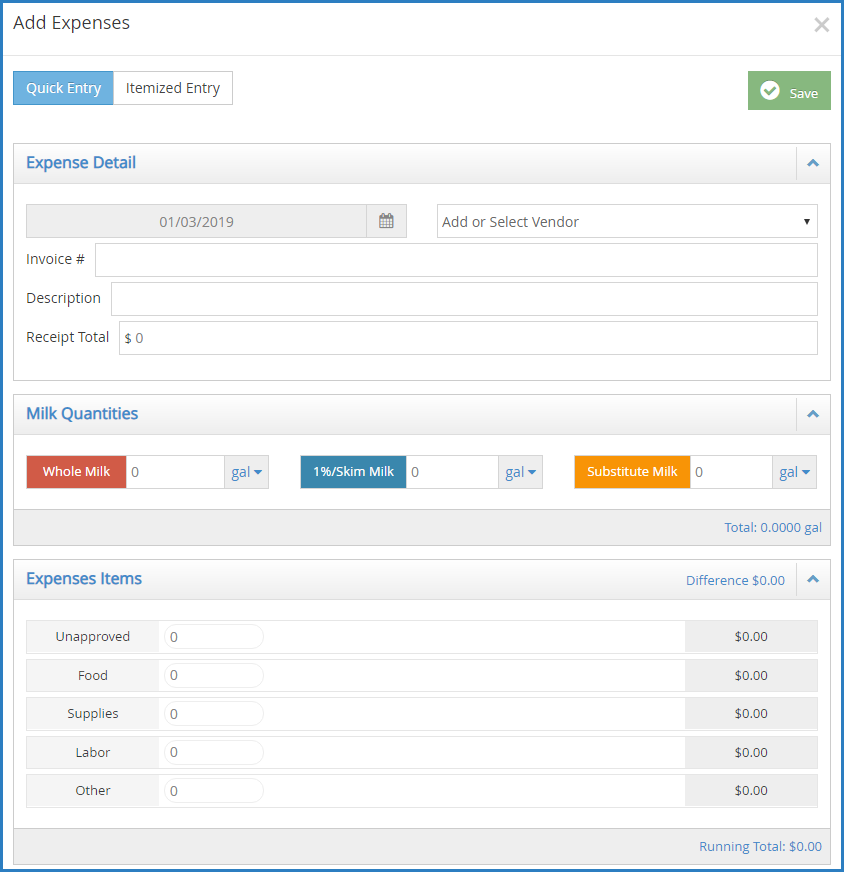
- Select Quick Entry or Itemized Entry.
- Enter your milk quantities. For instructions, see Itemized Entry or Quick Entry.
- Click Save.
- In the Draggable Events section, click the Purchase event and drag it to the calendar.
- To edit an event:
- Click the event to edit. A pop-up opens.
- Enter new information over the existing information. Note that you cannot change the event date.
- Click Save.
- To remove an event:
- Click the X in the right corner of the event banner.
- Respond to the confirmation prompt.
Additional Calendar Items
The following items also display on the calendar:
- Required: Required amounts display for each day where an calculated or calculated + actual calculation is present. You cannot add, move, or remove these markers.
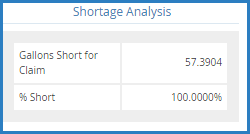
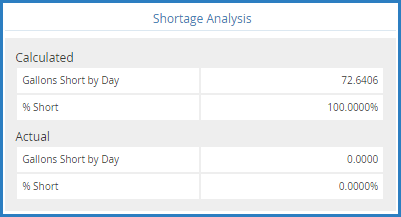
 Milk Shortage (Calculated): This icon displays on each day for which the daily ending balance value is calculated to be negative. Click this icon to view the anticipated shortage amount.
 Milk Shortage (Actual): This icon displays on each day for which the daily ending balance based on the calculated values is negative. Click this icon to view the actual shortage amount.
- Shortage Analysis: This section displays the calculated total amount of gallons you are short by day or by claim. This is determined by how your system is set up. For sponsored centers, your food program sponsor makes this distinction. If you selected Calculated + Actual at the top of the page, the actual shortages display as well.