You can customize the welcome letter sent to your centers when you first enroll them in your sponsorship. If you are implementing your centers with KidKare instead of Minute Menu CX, you can toggle the email content to the KidKare version.
Minute Menu CX Content
The Minute Menu CX Welcome Letter includes the following information:
- A brief introductory message.
- Minute Menu installation instructions and al ink to the install file.
- Center admin login information.
- A link to the Get Started videos.
- A signature.
KidKare Content
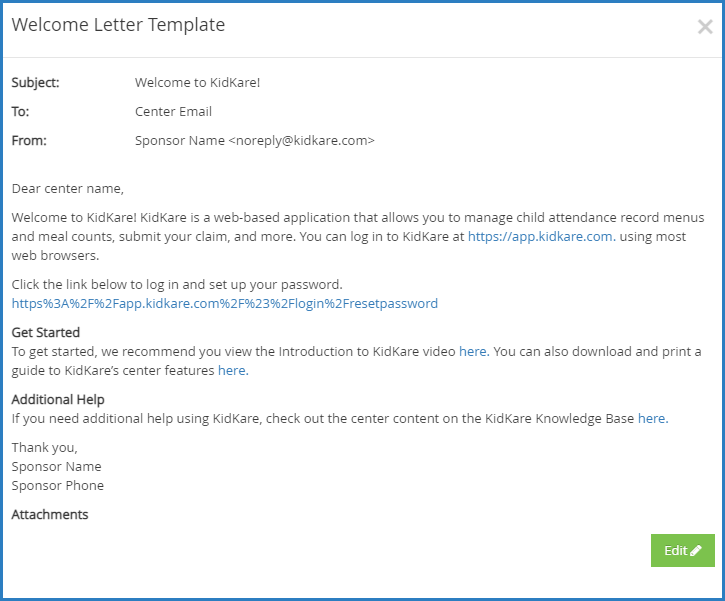
The KidKare Welcome Letter includes the following information:
- A brief introductory message.
- A link to allow the center admin to log in and set a password.
- A link to the Introduction to KidKare for Sponsored Centers video.
- A link to the KidKare Features for Sponsored Centers PDF.
- A link to the KidKare Knowledge Base.
- A signature.
To customize the letter:
- Log in to app.kidkare.com. Use the same credentials you use to access Minute Menu CX.
- Click
 . The Settings page opens.
 - In the General Settings section, click Edit Welcome Letter Template. The Welcome Letter Template pop-up opens.
- Click Edit.
- Update the Subject and From boxes, as needed. Variables you can use to fill-in certain information are listed at the bottom of the editor (SponsorName, CenterPhone, and so on). To add one of these variables to your text, type @ and begin typing the variable to use. A list of available items displays as you type, so you can select the variable you need. For example, to add the provider's name to the Subject, you would type @CenterName in the Subject box.
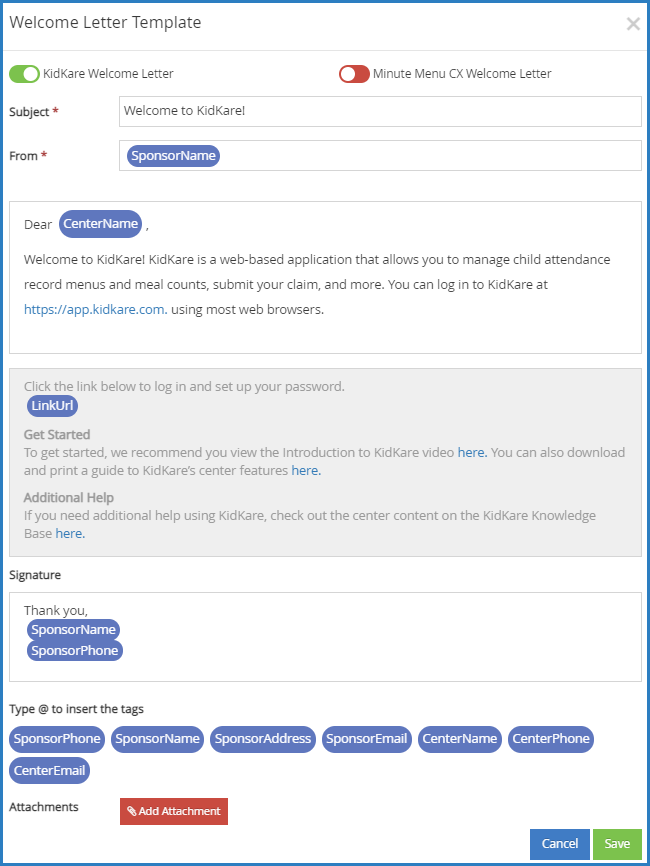
- Specify which welcome letter you are sending: KidKare or Minute Menu CX. The letter marked with
 is the active one. To enable the other template, click
  . Note that the slider turns green and the other letter's slider turns red. You can only have one active welcome letter at a time.
 - Click the first Message box and customize your messaging. Just as you did in Step 5, you can use variables to complete certain information, such as the center's name.
- Click the Signature box to customize your signature.
- Click Add Attachment to add any attachments needed.
- When finished, click Save.
 . The Settings page opens.

 is the active one. To enable the other template, click
  . Note that the slider turns green and the other letter's slider turns red. You can only have one active welcome letter at a time.