You can create a CX test account and use it to train yourself, your staff, and your center at no cost to you.
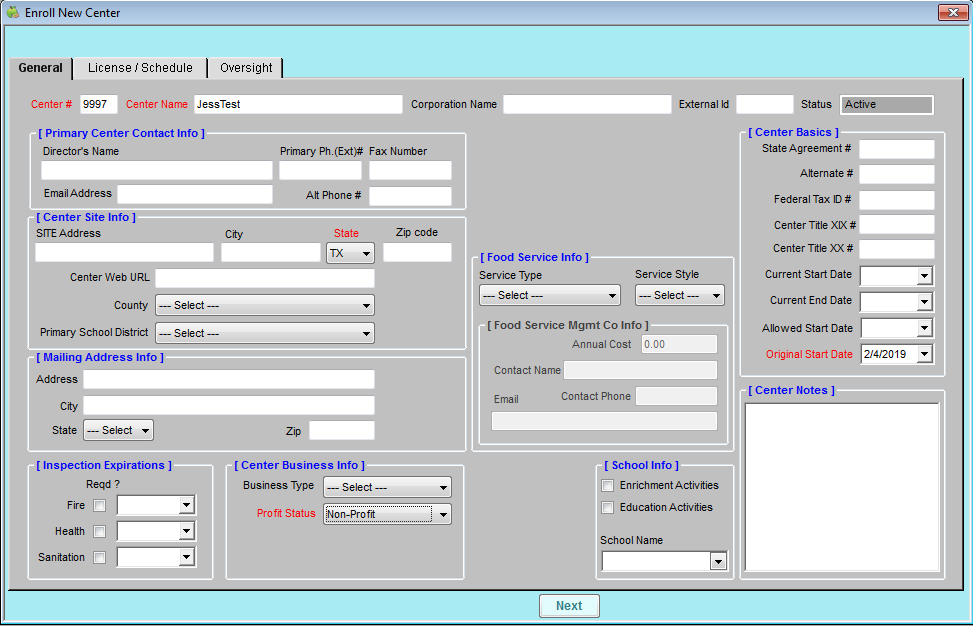
- Click Enroll Center from the toolbar at the top of the window. The Enroll Center window opens to the General tab by default.
- Click the Center # box and enter a center number. You can enter any number that is not currently in use.
- Click the Center Name box and give this center a name. Be sure to use the word Test in the name.
- Click the Email Address box and enter your own email address.
- Complete the remaining required fields. Required fields are: State, Original Start Date, and Profit Status.
- When finished, click Next. The License/Schedule tab opens.
- Complete the required fields in this tab. Required fields are shown in red and may vary by state.
- When finished, click Next. The Oversight tab opens.
- Click the Login box and enter a new log in ID that is easy to remember.
- Click the Password box and enter a new password.
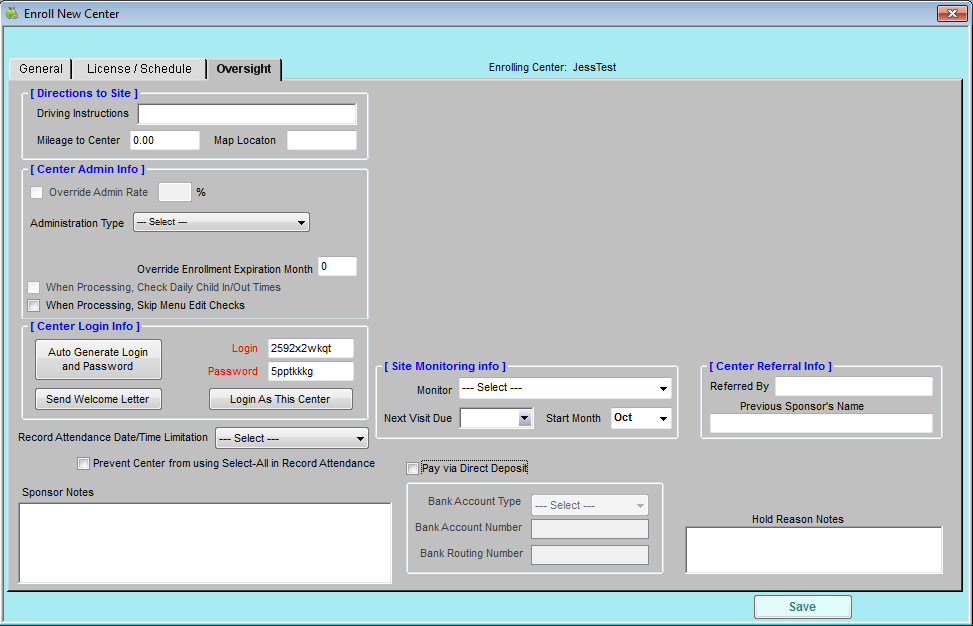
- Click Save.
- Click Send Welcome Letter to send a welcome letter to the email address you entered in the General tab. A web page opens.
- Click Send Email.


The welcome email includes a Start-Up Guide that walks you through the center side of the account. We recommend you enroll a child in age group, plan and record meals, print menu production records, record attendance, and so on. We also encourage you to share your test center account with other staff members to help them learn CX.