Enter receipts into Minute Menu CX to ensure that centers are running a non-profit food service. This is also a required step for completing the Milk Audit. Both sponsors and centers can enter receipts (subject to policy T.1). The instructions in this article are applicable to both user types. However, if you are a center, begin at Step 2 under each heading.
If you allow sites to enter receipts, you, the sponsor, should use the verification process to ensure receipts were categorized correctly. For more information, see Verify Receipts.
Note: You must add vendors before you can enter receipts. See Add Vendors for more information.
Quick Entry
- Click the Select Center drop-down menu and select the center.
- Click the Tools menu and select Manage/Verify Receipts. The Manage Receipts page opens in an Internet browser.
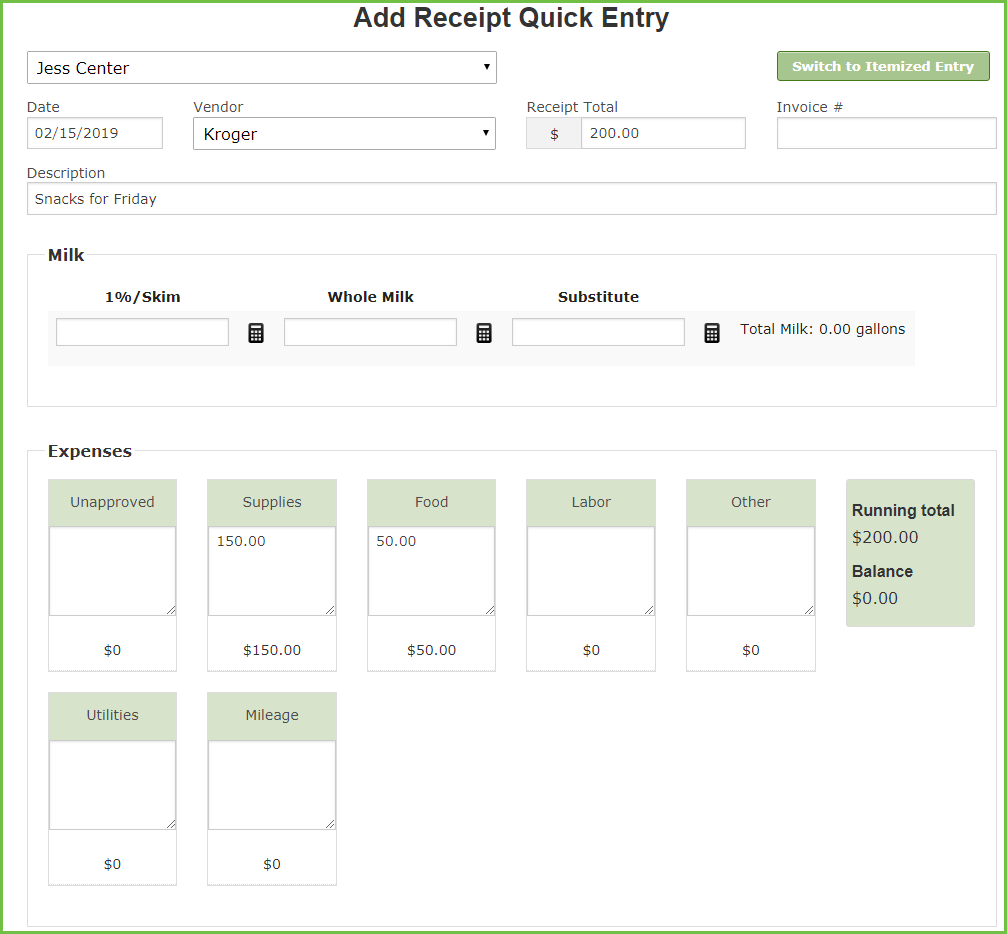
- Click Add Receipts. The Add Receipt Quick Entry page opens.
- Click the Date box and select the date on the receipt.
- Click the Vendor drop-down menu and select the vendor.
- Click the Receipt Total box and enter the total amount on the receipt.
- Click the Description box and enter a description of this purchase. This box is optional. However, information entered here prints on reports.
- In the Milk section, enter the quantity of each milk type purchased.
- Click
 to use the Gallons Converter to calculate the amount of gallons purchased.
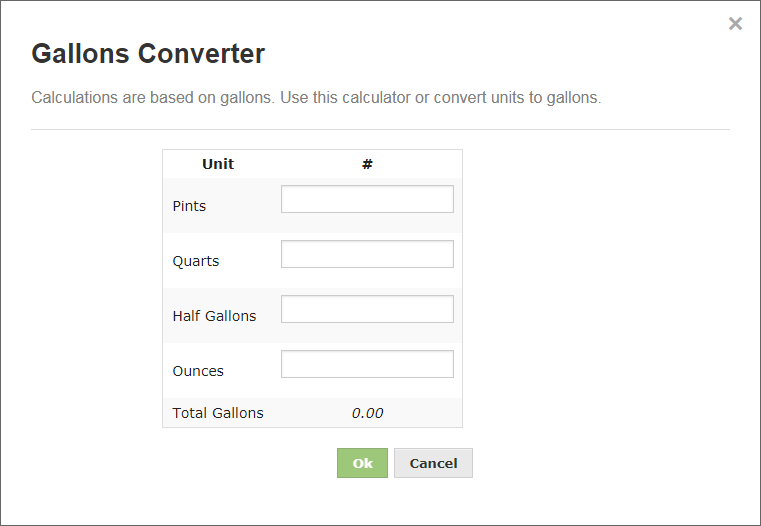
- Enter any milk that is not cow's milk (such as, almond milk, soy milk, and so on) in the Substitute box.
- Click
- In the Expenses section, enter the expenses from the receipt. Expenses are arranged in the following categories:
- Unapproved: Items that are non-food program approved, such as office supplies.
- Supplies: Food-program related supplies, such as paper plates, spoons, and so on.
- Food: Food items.
- Labor: Amount paid x hours worked for the food program. For example, if you are entering a receipt for a cook, you would put what you paid them in this category.
- Other: Taxes. This is required by some states.
- Utilities: Utility charges, such as electricity, water, and so on.
- Mileage: Miles driven to the vendor and back.
- When finished, click Save and Exit to save this receipt and exit, or click Save and Add to save and add another quick entry receipt.
 to use the Gallons Converter to calculate the amount of gallons purchased.

Notes: As you enter expenses, the Running Total field updates automatically. This value and the Balance must match before you can save the receipt. Type / (forward slash) in a category box to automatically apply the remaining balance to that category.
Itemized Entry
- Click the Select Center drop-down menu and select the center.
- Click the Tools menu and select Manage/Verify Receipts. The Manage Receipts page opens in an Internet browser.
- Click Add Receipts. The Add Receipt Quick Entry page opens.
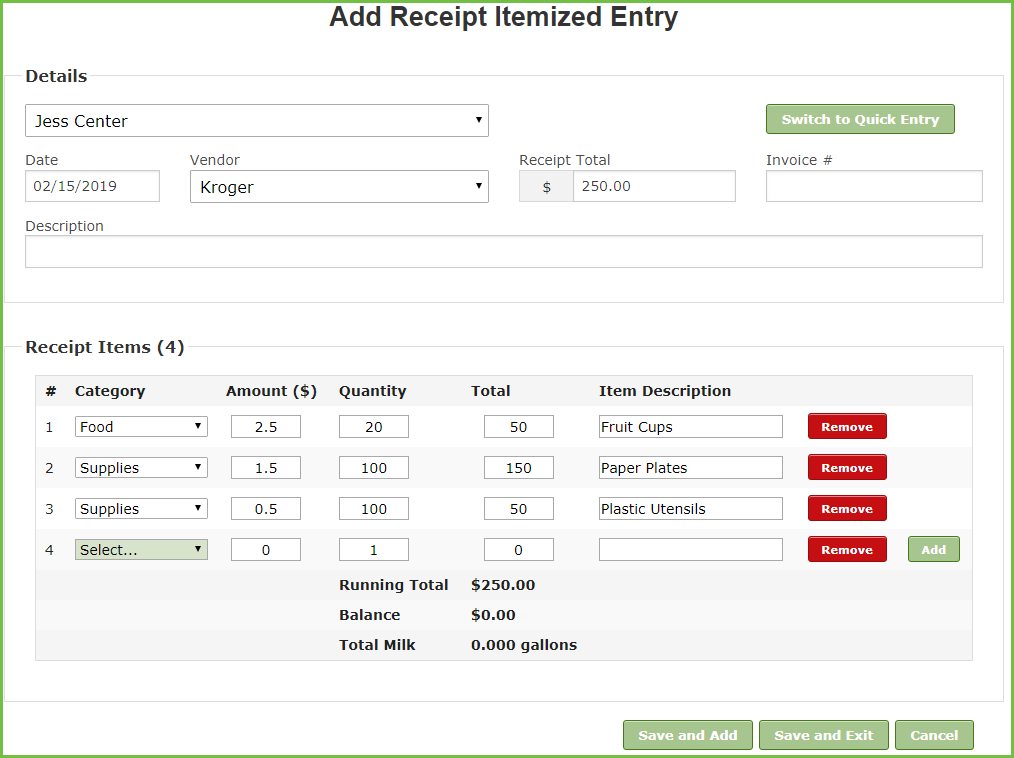
- Click Switch to Itemized Entry.
- Click Add Receipts. The Add Receipt Quick Entry page opens.
- Click the Date box and select the date on the receipt.
- Click the Vendor drop-down menu and select the vendor.
- Click the Receipt Total box and enter the total amount on the receipt.
- Click the Description box and enter a description of this purchase. This box is optional. However, information entered here prints on reports.
- In the Receipt Items section:
- Click the Category drop-down menu and select the category for this line item. Refer to Step 9 under the Quick Entry heading (above) for category descriptions.
- Click the Amount box and enter the price for one unit of the line item.
- Click the Quantity box and enter the amount of the item purchased. The Total box updates automatically.
- Click the Item Description box and enter the name of the item.
- Click Add and repeat Steps 10a - 10e for each line item on the receipt. Click Remove next to a line item to remove it.
Note: If you select a Milk category in Step 10a, click
 to use the Gallons Converter.
- When finished, click Save and Exit to save this receipt and exit, or click Save and Add to save and add another itemized receipt.
 to use the Gallons Converter.