Minute Menu CX has tools that can help you process and monitor claims without printing reports to paper. Most reports in Minute Menu CX print to PDF automatically, so there is no need to export or update your printer settings to a PDF writer. Ensure you have a PDF reader, such as Adobe Acrobat Reader or Cute PDF, installed to your machine. Adobe Acrobat Reader and Cute PDF are both free to download and install.
Stop the Office Error Report From Printing Automatically
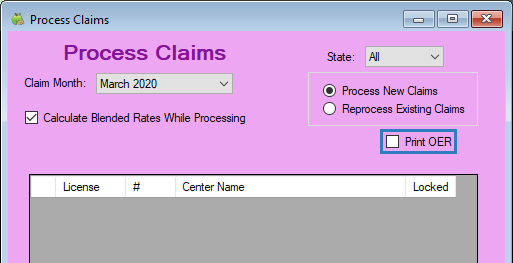
Typically, the Office Error Report is sent to your printer by default during claims processing. If you do not have a printer available, or if you no longer wish to print physical copies of the Office Error report, you can process claims without printing this report. Don't worry—you can print it to PDF later. See Generating and Saving the Office Error Report heading, below.
- Click the Claims menu and select Process Claims. The Process Claims window opens.
- Click the Claim Month drop-down menu and select the correct claim month.
- Check the Calculate Blended Rates box, if applicable.
- Clear the Print OER box.
- Complete claims processing as you normally would. For details, see Process Claims.

Generate and Save Error Reports
Even if you skip automated printing during claims processing, you can generate the Office Error report and save a digital copy to your computer. There are several ways you can do this:
- Reports Menu: Click the Reports menu, select Claims, and click Office Error Report. For more information, see Print the Office Error Report (OER).
- List Claims Window: Click the Claims menu and select List Claims. Click OER for the claim for which to print the Office Error report.
Generate & Save Center Error Letters
You can also generate a center error letter and save or send it digitally.
- Click the Reports menu, select Claims, and click Center Error Letter.
- Select Selected Center, All Active Centers, or Select Multiple Centers.
- Click Run Report. If you selected Select Multiple Centers in Step 2, you can set additional filters to retrieve specific centers. Otherwise, the Select Date dialog box opens.
- Select the claim month for which to run the report.
- Click Continue. The PDF is generated and you can save a copy to your machine.