Log messages are messages for centers that are typically for your agency's eyes only. However, you can also make these messages visible to centers, if needed.
- Click the Tools menu and select Message Center. The Message Center window opens.
- To create a new log message:
- Click New Message. The New Message window opens.
- In the Message Type section, select Internal Log Message.
- Check the Visible to Center box to make this log message visible to the center(s) you select. If you check this box, this message displays the center's Log Message tab.
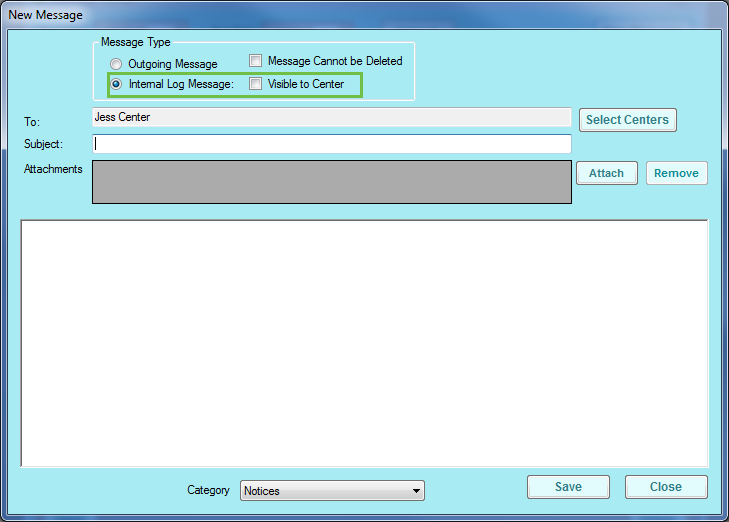
- Click Select Centers and select the center(s) associated with this message. If you already have a center selected in the Select Center drop-down menu at the top of the application window, that center populates the To box by default.
- Click the Subject box and enter a subject for this message.
- Click Attach to attach a file to this message, if needed.
- Click the text box and enter the body of the message.
- Click the Category drop-down menu and select the category to which to assign this log message. You set up message categories in the Manage Message Categories window. For more information, see Manage Message Categories.
- To review log messages:
- Click the Log Messages tab.
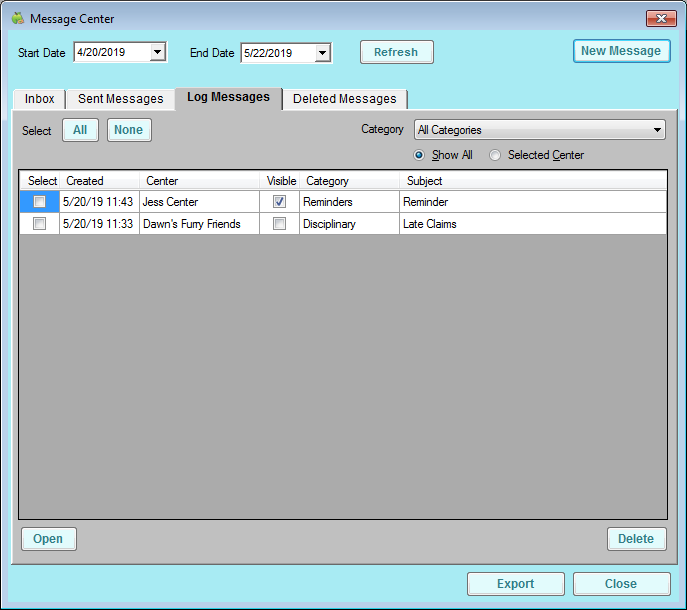
- Click the Category drop-down menu and select the category by which to filter the list.
- Select Show All to view log messages for all centers, or select Selected Center to view log messages for the center selected in the Select Center drop-down menu at the top of the application window. The following information displays:
- Created: This is the date and time the message was created.
- Center: This is the center to whom the message was directed.
- Visible: A check in this box indicates that the center can also see this message.
- Category: This is the category assigned to the message.
- Subject: This is the message subject.
- Check the Select box next to a log message and click Open to view the message itself. You can also double-click the message to view. The View Message window opens.
- In the View Message window, click Print to print the message.
- Click Previous or Next to navigate through messages.
- When finished, click Close to exit the View Message window.
- Click the Log Messages tab.
- To export log messages:
- Check the Select box next to each message to export. You can also click All to select all displayed messages.
- Click Export. The messages you select are exported to a spreadsheet file.
- To delete log messages:
- Check the box next to the sent message to remove.
- Click Delete. The messages are deleted and placed in the Deleted Messages tab.

