Use the Milk Audit to compare the amount of milk purchased with the amount of milk needed, based on menus and meal counts. Before using this feature:
- Enter receipts. For more information, see Add Receipts.
- Record menus.
- Record meal counts.
Milk Audit Policies
There are several specific configuration choices that impact how the milk audit determines shortages and what disallowances are made when a shortage is found. You can adjust these policy settings in the Manage Policies window. Policies related to the milk audit start at policy M.6.
Viewing the Milk Audit
Once you are ready to perform the Milk Audit:
- Click the Select Center drop-down menu and select the center.
- Click the Claims menu and select Milk Audit. The Monthly Overview Milk Audit window opens.
- Click the Claim Month drop-down menu and select the claim month to view. The monthly totals for each milk type display, as do totals for each type.
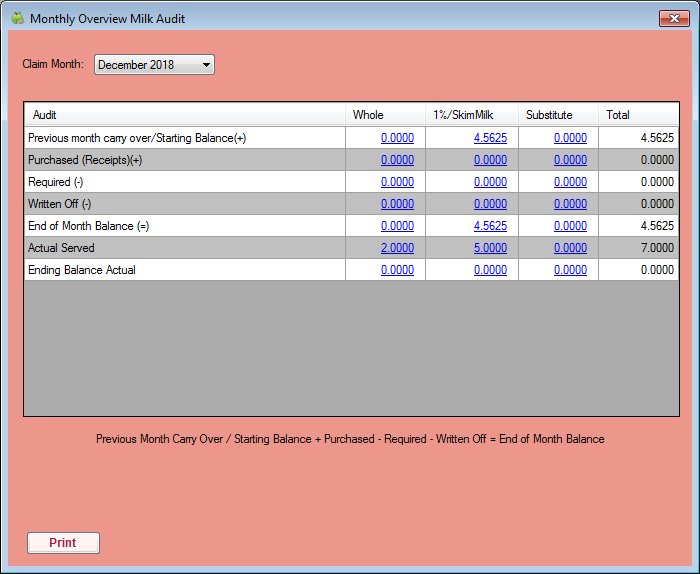
- Click the link in each column to view the daily milk overview. The Daily Overview Milk Audit window opens.
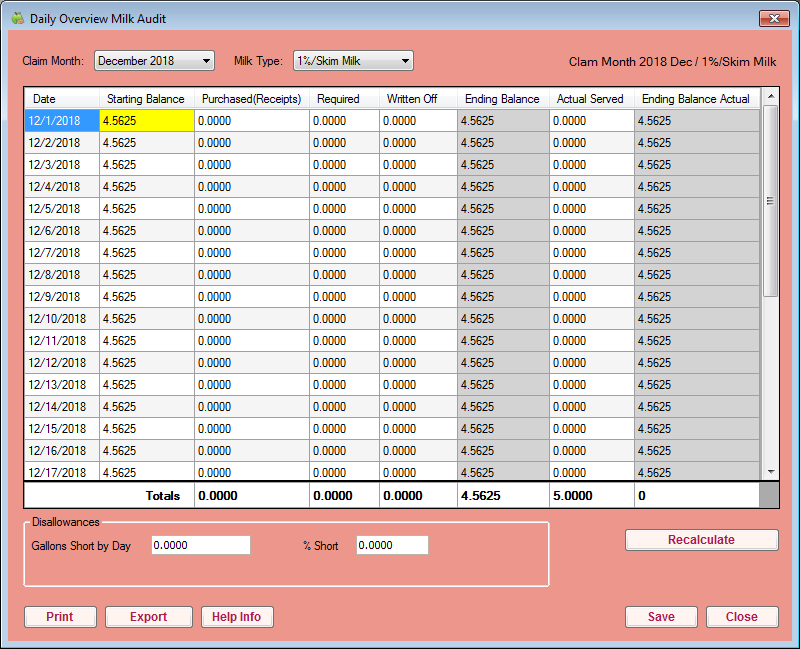
- In the Daily Overview Milk Audit window:
- Click the Claim Month drop-down menu to select a different claim month.
- Click the Milk Type drop-down menu to view a different milk type.
- The following information displays for the selected month and milk type:
- Starting Balance: This may be the ending balance from the previous month (depending on your specific policy settings). You can click this field to edit the starting balance.
- Purchased (Receipts): This is the amount of milk purchased, based on receipt date.
- Required: This is the amount of milk required based on menus and meal counts.
- Written Off: Click this box and enter the amount of milk that was written off for a specific day. This is for cases in which the milk was spilled, spoiled, and so on.
- Ending Balance: This is the amount of milk leftover at the end of each days. Shortages are highlighted in red.
- Click Print to print the Milk Audit report. A PDF is generated.
- Click Export to print the Milk Audit report as an XLSX (spreadsheet) file.

