You can use Minute Menu CX to print checks or issue direct deposits to centers. However, even if you choose to use another program to issue checks or direct deposits, you can still mark payments as Paid in Minute Menu CX in the Issue Payments function.
Note: Policy A.05 must be set to N before you can access the Issue Payments function.
- Select payments.
- Click the Payments menu and select Issue Payments. The Issue Payments window opens.
- In the Payment Method section, select the Checks option or the Direct Deposits option. You must complete these steps twice if you are using both checks and direct deposit.Note: If you are running this function only to mark claims as Paid (i.e., you are not printing checks or creating a direct deposit file), select the Checks option.
- Check the box next to the claim(s) you need to pay or mark as Paid.
- Click Calculate. A list of unpaid centers displays in the bottom half of the center.
- Check the box next to each center to pay.
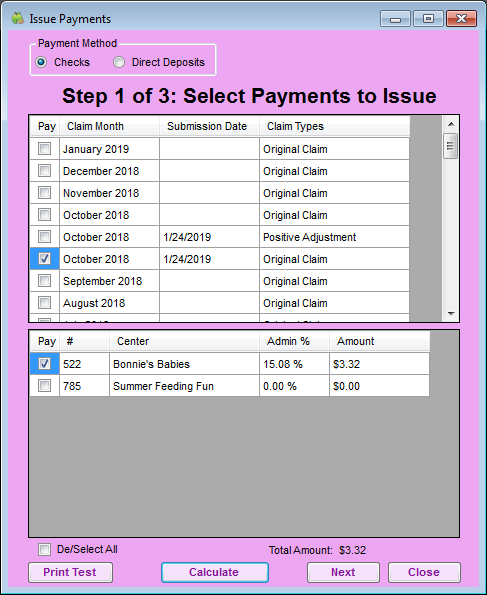
- Click Next.
- Now, print checks or generate the ACH file for direct deposit.
- Click the First Check Number/Starting DD Number box and enter the starting check/voucher number.
- Click the Payment Date box and select the payment date. This date is visible to centers in the center-side of Minute Menu CX. If you are printing checks in advance, select the date that payment will actually be sent to the centers.
- Select the sort order. You can sort by center name or center number.
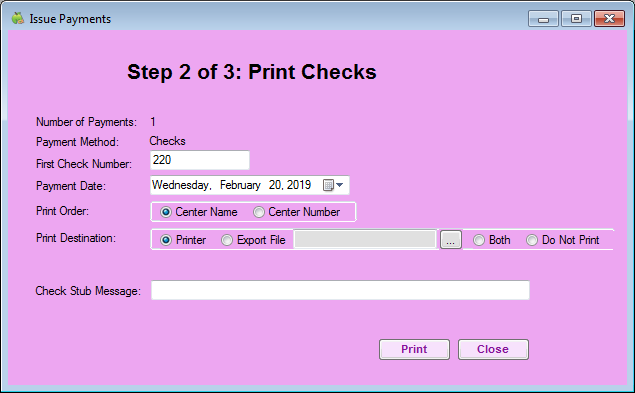
- Select a print destination for the checks/vouchers.
- Select Printer, Export File, Both, or Do Not Print.
- If you select Export File or Both, click
 and select the file in which to save the exported file.
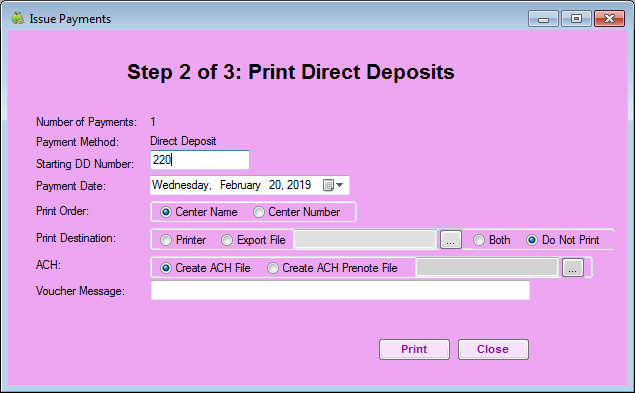
- (Direct Deposit Only) Select Create ACH File.
- Click the Check Stub Message/Voucher Sub Message box and enter any kind of message to print on the check stub.
- Click Print.
- Verify that the checks/vouchers printed successfully and without paper jams. Minute Menu CX will ask if all checks printed successfully. This is your last chance to easily re-print checks in a batch. Be absolutely sure that the checks printed successfully before responding to the confirmation prompt.


 and select the file in which to save the exported file.
Viewing the Check Register
- Click the Payments menu and select Check Register. The Check Register window opens.
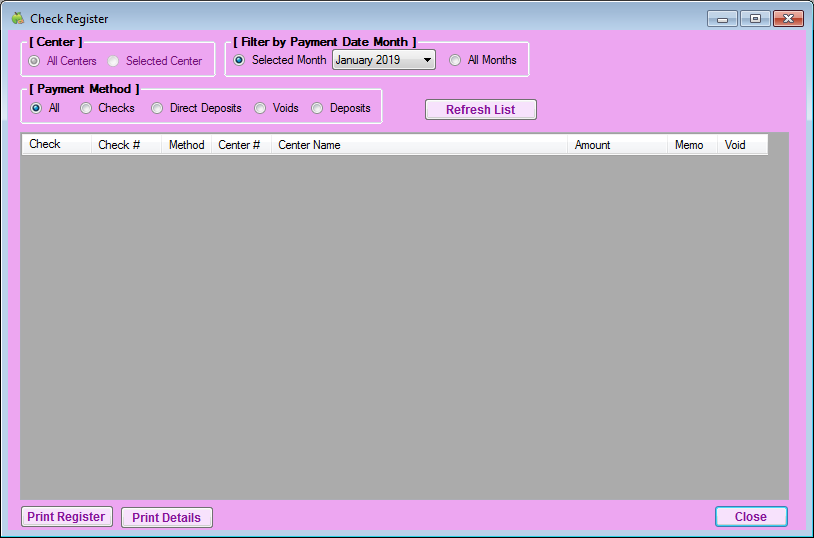
- Set filters, as needed.
- Click Refresh List. Payments that meet the limits you set display.
- Click Print Register to print the check register.

Note: You can also access the check register for an individual center. Click the Select Center drop-down menu, select the center, and click Centers. The Manage Center Information window opens. Click Payments. The Check Register window opens.