When you create internal log messages in the Message Center window, you can assign categories to them. You set these categories up in the Manage Message Categories window. If you do not set up message categories, all internal log messages are assigned to the General category by default.
- Click the Tools menu and select Manage Message Categories. The Manage Message Categories window opens.
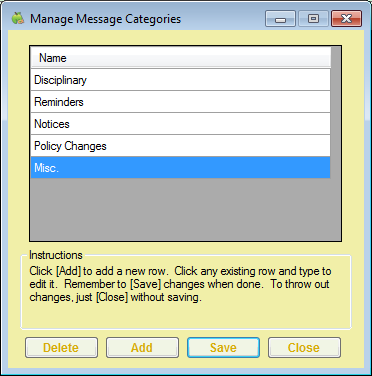
- To add a message category:
- Click Add. A blank row displays.
- Click the new row and enter the name of the message category.
- Click Save.
- Click OK at the success message.
- To change a message category:
- Click the category to change.
- Enter the new category over the existing category.
- Click Save.
- Click OK at the success message.
- To delete a message category:
- Click the category to delete.
- Click Delete.Note: Ensure that you have selected the correct message category to remove. There is no confirmation message, and the message category is removed immediately.
- Click OK at the success message.

Note: You must close and re-open Minute Menu CX before new messages categories are applied to the Category drop-down menu in the New Message window.