You can create centralized menus for individual site use. First, create one or more master menu plans. Then, release them to the sites you choose. Once sites receive the master menu, they can print the Menu report and post it in their center for staff and parents to see.
The master menu feature was designed to be used for multiple sites that are using the same menu, such as those with a central kitchen, to make menu planning easier. If an individual center has its own menu plan that differs from other sites, there is no need to create master menus. Your center can plan their own menus from their own account.
Adding Master Menus
- Click the Menus/Attendance menu and select Master Menu Calendar. The Master Menu Calendar window opens.
- Click Add/Edit. The Master Menus dialog box opens.
- Click Add. A blank line is added to the top of the list.
- Click the blank line and enter a name for this menu.
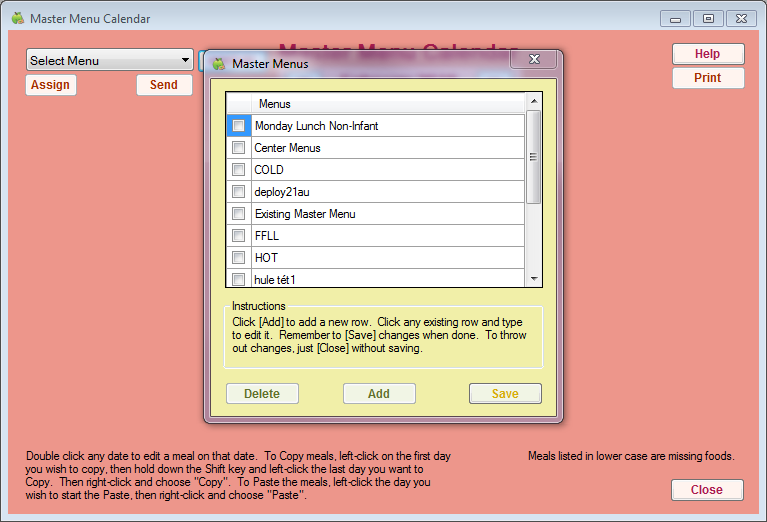
- Click Save. A confirmation prompt displays, and the Master Menus dialog box closes.
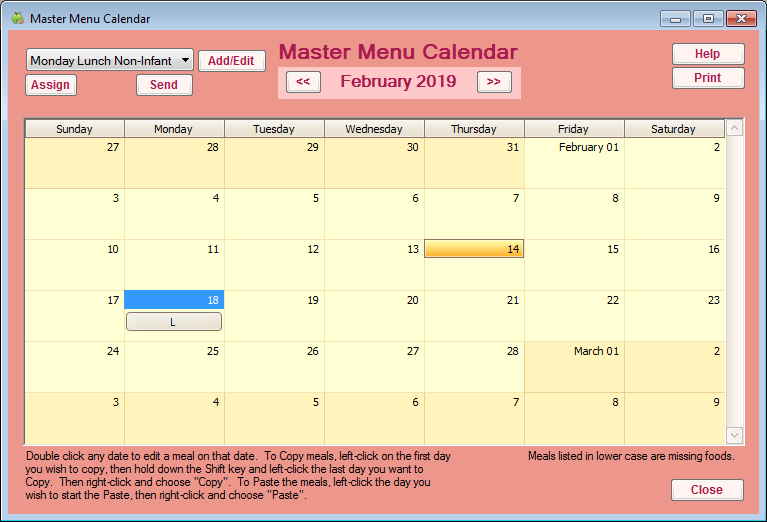
- Now, click the Select Menu drop-down menu and select the menu you just created. A calendar displays.
- Double-click the date on which this menu should be served.
- At the Select Meal prompt, select the meal you are planning. For example, if you are creating a lunch menu, you would select Lunch. The Plan Master Menu window opens.
- Click
 next to each meal component to select a food. You can also click Use Menu Template to select a saved menu template.
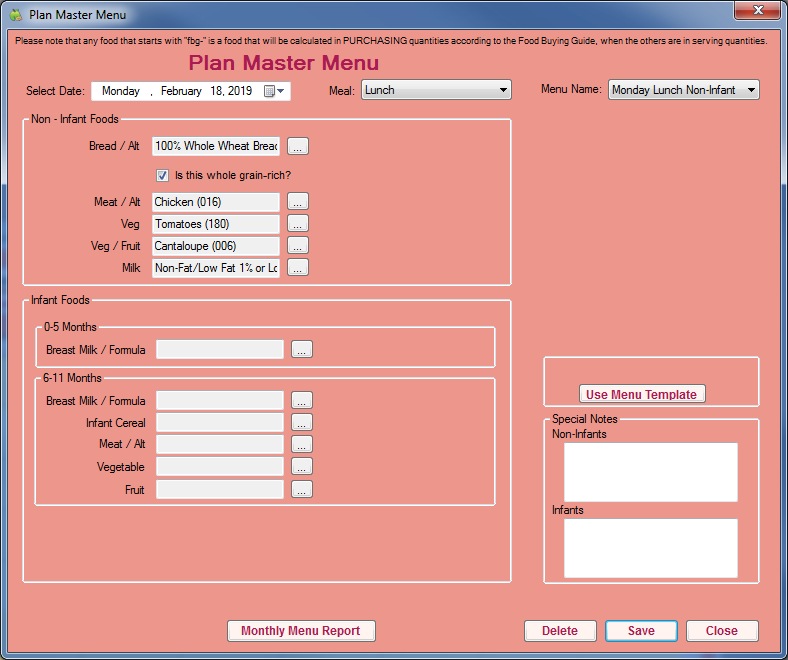
- When finished, click Save. You can now select a new day and/or meal to create a new master menu.
- Click Close to return to the Master Menu Calendar window. The menu(s) you created display on the calendar. Menus that are missing components display in lower case letters (b, a, l, p, d, or e) and Menus with no missing components display in uppercase letters (B, A, L, P, D, or E).

 next to each meal component to select a food. You can also click Use Menu Template to select a saved menu template.

Copying and Pasting Master Menus
You can copy and paste master menus one day, several days, one week, or one month at a time.
- In the Master Menu Calendar window, click and drag your mouse across the days you are copying.
- Right-click the highlighted area and select Copy.
- Right-click the day on which to begin pasting and select Paste.
Assigning Master Menus to Centers
To assign a Master Menu to a center:
- In the Master Menu Calendar window, click the drop-down menu and select the menu to assign.
- Click Assign. The Select Centers For dialog box opens.
- Check the box next to each center to which to assign this menu. You can also click Select All to select all listed centers. Click Deselect to clear your selections.
- When finished, click Save.
Sending Master Menus to Centers
When you are ready to send master menus to centers, we recommend that you review the menu first. Once you send menus to centers, changes to the existing master menus will not update the center menus. If any changes are needed, you must make them for each center individually. Centers should also be trained to enter any food substitutions made.
When you are ready to send menus:
- In the Master Menu Calendar window, click the drop-down menu and select the menu to send.
- Click Send.
- Respond to the confirmation prompt. The menus are sent to all centers to which they were assigned. These menus display in the Record Menu window and in the Menu Calendar window for both centers and sponsors.